


How To Install Blinds & Shades
How To Install Blinds & Shades
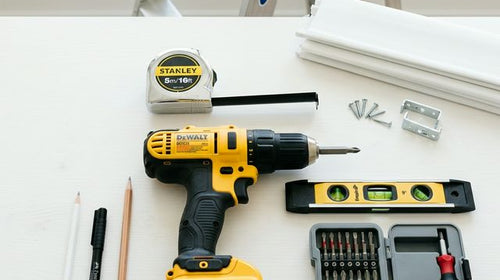
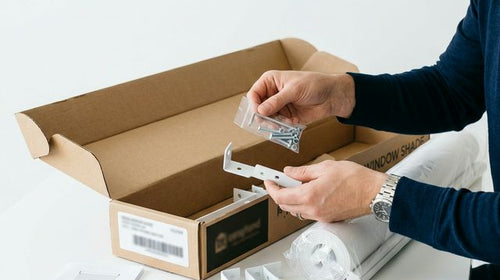
SmartView Homes blinds and shades are made to fit your window size and mounting choice. If you're installing for the first time—or just need a quick refresher—use the guide below. Start with the universal steps, then jump to your product type to follow the video or the written steps.
Universal Steps Before Installation

Roller & Zebra Shades
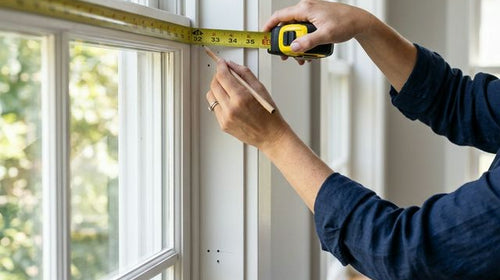
Hold the shade up to the planned mounting surface (inside or outside mount). Position the brackets based on the headrail/cassette ends and mark screw locations with a pencil. Repeat for the other side (and center bracket if included). Use a level to confirm both marks are aligned.
Installation Steps
Mark Positions
Hold the shade up to the mounting surface. Position brackets and mark screw locations with a pencil. Use a level to confirm both marks are aligned.
Install the Brackets
Drill pilot holes at the marked points. Screw the brackets firmly into the window frame, wall, or ceiling surface.
Install the Shade
Align the headrail/cassette with the mounted brackets. Seat one side first, then press/tilt the opposite side into the bracket until it locks in place. Gently tug to confirm it's secured.

Cellular Shades
Cellular (honeycomb) shades help with insulation and sound reduction. Installation uses snap-in brackets and a headrail that clicks into place.
Installation Steps
Mark Positions
Position brackets where the headrail will sit. Mark screw locations, then confirm everything is level.
Install the Brackets
Drill pilot holes. Screw brackets into the mounting surface.
Install the Shade
Hook the headrail into the back of the brackets first (if applicable). Rotate upward and press until the headrail clicks into place.

Woven Wood (Bamboo) Shades
Woven wood shades add natural warmth with bamboo, rattan, and jute textures. The headrail uses a wing-nut fastener system.
Installation Steps
Mark Positions
Hold the shade up to the mounting area. Mark bracket/fastener screw points and verify level.
Install the Brackets
Drill pilot holes. Secure brackets (or mounting clips) with screws.
Install the Shade
Set the headrail into the brackets or align the headrail slots with the fasteners. Tighten wing nuts or lock the clips as required for your model.

Outdoor Shades
Outdoor shades mount to exterior surfaces and need extra attention to hardware tightness. Use appropriate anchors for your surface type.
Installation Steps
Mark Positions
Hold brackets to the pillar/frame where you'll mount. Mark points, confirm level, and repeat for all brackets.
Install the Brackets
Drill pilot holes suitable for the mounting surface. Screw brackets securely (use appropriate anchors if needed).
Install the Shade
Wall Mount: Hook the valance/headrail into the bracket hooks. Press tabs/clips until they lock. Ceiling Mount: Align the internal slots with ceiling brackets. Press tabs/clips until they lock. Repeat for all brackets and confirm stability.

Drapery
Drapery track installation has more steps. Follow your instruction diagrams closely, especially for splicing and runner setup.
Installation Steps
Track Splicing (If Needed)
Unpack and lay out the track sections. If your track is longer than a single piece, connect sections using the joint bracket and tighten screws. Confirm the track glides smoothly after splicing.
Track Runner Removal
Loosen the end locking piece. Slide extra runners to the end and remove them. Reinstall the end cap/lock and retighten.
Fabric Hook Installation
Insert hooks into the correct holes before mounting the track (if your model requires pre-install).
Track Installation
Choose ceiling or wall mount. Install brackets, confirm level, then snap/lock the track into place.
Valance & Motor
Mount valance brackets. Press valance into place until it clicks.
Fabric Installation
Insert the motor into the track end and lock it. Power on and test basic movement.
Fabric Installation
Identify front/back of the fabric. Attach fabric clips/hooks to the carriers and adjust spacing as needed.

Dual Shade
Dual shades use two fabrics to switch between light filtering and room darkening. Some models include additional brackets/valance pieces.
Installation Steps
Mark Positions
Position installation brackets (and any valance brackets if included). Mark screw points and confirm level.
Install the Brackets
Drill pilot holes. Secure brackets with screws.
Install the Shade
Insert the motor/idler side into the correct bracket first (model dependent). Seat the opposite side and lock into place.
Install the Valance (If Included)
Align the valance with the valance brackets. Press until it clips in and sits evenly.

Harmony Duo Plus Dual Shade
This style uses a squared valance/cassette design that reduces top light gaps and provides a finished look.
Installation Steps
Mark Positions
Mark bracket positions based on the cassette/headrail ends. Repeat for all brackets and confirm level.
Install the Brackets
Drill pilot holes. Secure brackets with screws.
Step 3: Install the Shade
Seat one side of the cassette into the bracket. Press/tilt until the opposite side locks with a click.

Roman Shade
Roman shades can vary by lift type. Use the notes below that match your product: Cordless or Cord Lift.
Installation Steps
Mark Positions
Hold the headrail at the mounting location. Mark bracket positions and confirm level.
Install the Brackets
Drill pilot holes. Screw brackets into place.
Install the Shade
Align headrail with brackets. Click/lock the headrail into the brackets. Test operation slowly (raise/lower) before finalizing.
Cordless Roman Shade: Lift from the bottom hem with two hands for even raising. If the shade is uneven after first install, cycle it up/down a few times to settle.
Cord Lift Roman Shade: Confirm cord routing is free of twists. If a cord tensioner or safety device is included, install it according to the manual.